May 2013 Meeting

This was a club night where members of the club gave a demonstration.

Our Chairman Kathy  welcomed  Sue Potter, the new Surrey  regional officer  from the  Guild of Machine Knitters, who was visiting us for the first time.

We also extended a welcome to two more guests who are interested in machine knitting.

The first demonstration was by Brenda who showed us how she does button/button hole bands on a cardigan.

he gave us a rule of thumb for the band length – as a starting point then described various types of button bands – edges picot, plain, tucked to give a scalloped effect, single or double (better).

The tensions relate to the garment tension – in general the button band should be T-1 and the fold row T+2.

The final row  after picking up the garment edge on machine should be the same tension as the  garment.

Choose the number of rows to be even so buttonhole is central (excluding the turning row) 8 or 16 for example as this ensures top button in particular is central as it would show up more.

A quick tip: you can put button small holes on the join between the band and the garment, done when picked up so no separate button hole required – easy to do  but garment needs to be V neck or top button will be offset to one side! It is suitable for narrow bands only.

In general, the button band should run up and over the neckband for more slimming look.

Older styles of garment were the opposite, finishing below neckband.

Generally bands are stocking stitch even if other bands on the garment are ribbed,   a ribbed band it can cause a problem with tension matching.

Starting  the button band
Starting the button band

Selecting the needles for the button holes

Picking up the button hole stitches on the "return" part of the band
Picking up the button hole stitches on the “return” part of the band

Needles in hold to ensure they knit off correctly

Showing how the button band overlaps the neckband

A contrasting button band on a fairisle cardigan

 Examining the samples
Examining the samples


Frances then showed us how to put a pocket in a cardigan or jumper. This method needs no sewing up apart from catching in the pocket top after the rest is completed. It makes a neat and flat pocket with your own choice of trims at the top.

Full Instructions will be available later.


Using hold position to do waste knitting at pocket bottom position.
Using hold position to do waste knitting at pocket edge.

Picking up from below the waste knitting to continue
Picking up from below the waste knitting

Holding stitiches each side of pocket with I needle out of work
Holding stitches each side of pocket with I needle out of work

Rehanging Garment
Rehanging Garment

Picking up pocket bottom

Making pocket top trim
Hanging pocket top trim

Hanging pocket top trim


Last but not least, the show and tell

Gill's jacket made on a Zippy 90
Gill’s jacket made on a Zippy 90

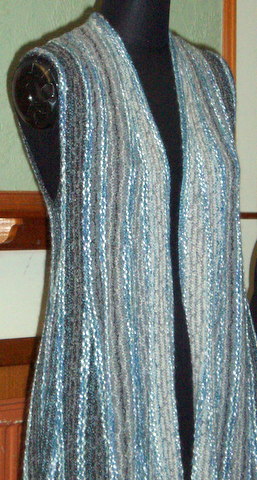
Gill, one of our newest members brought in a cardigan she had made on her recently acquired Zippy 90, a plastic bed chunky with only 90 needles.


Gillian's bunting
Gillian’s bunting

Gillian had made some bunting and brought that along for us to see.

Woven Jacket

April 2013 Meeting and AGM

After the formal business of the AGM, we were delighted to welcome Iris Bishop who is a  favourite speaker at our club.  Her talk was very entertaining and the garments and samples she brought along were a real feast for the eyes.  As usual her emphasis was on creating lovely fabric using her trusty  machine.  Many of the items had woven elements and her combinations of colours and yarn made some really fabulous innovative fabrics.  The yarns used varied from the industrial fine yarn to really chunky yarn and all, amazingly, worked on a standard gauge machine.


She showed us various garments and samples as well as giving detailed descriptions of how these were created.

Woven Jacket
Woven Jacket

We all enjoyed such an inspirational speaker whose no nonsense approach to knitting gave us all hope that we can achieve some of those lovely fabrics by following her patterns.

Close up of some of the fabrics

Pink and Cream Jacket
Pink and Cream sideways knitted Jacket

Sideways knitted with woven colours
Sideways knitted garment with woven colours

Sample using Jewel colours

Jacket sample showing fabric and interesting neck edging

Tuck and weave
Tuck and weave

Cream with woven in ribbons
Part of a lightweight poncho in with woven in ribbons

Pink with woven in ribbons

Grey woven collar
Grey woven collar


March 2013 Meeting

After some notices, Kathy, our chairman, welcomed our speaker Jennifer Hughes from Surrey Weavers talking on embroidered textiles of from around the world and especially from South East Asia.

She had brought a dazzling array of garments and sample from her extensive collection. She explained that many patterns of garments had ancient folklore associated with them, especially embroidery around the edges of garments, it was thought that evil spirits could be warded off by red patterns around the cuffs, necklines and at the bottom hems. In addition, many women’s garments had embroidery covering their reproductive areas as can be seen on items with embroidery across the bust and over the stomach and sometimes at the back. Aprons for example had originally been garments not to keep your clothes clean but as a protection against evil spirits.

Much of the work was very fine indeed, minute stitches covering both garments and linen and table cloths. Sometimes done by mothers and grandmothers for a girl’s trousseau. They were a display of wealth and status. Some garments embroidered with gold coloured thread had patterns representing jewellery such as necklaces and even earrings sewn on and this might have been done for a girl whose parents could not afford real gold jewellery for her wedding.

Many of these ancient craft skills were dying out in parts of the world when girls attended school rather than learning these at home. The respect for the needlecraft skills was lost once their societies moved into a more modern world were machines replaced hand sewn embroidery.

Sari Sample
Sari Sample

Cross stitich folk pattern

Sari Sample in pink and gold

Navyblue  Embroidered Coat
Navyblue Embroidered Coat

Chinese Baby Carrier

An Indian Jacket - back view
An Indian Jacket – back view

Back of Embroidered Coat

There were also a range of items to buy.

Margaret thanked everyone who had contributed baby jumpers and hats for the “Fish and Chip” babies in Malawi. So far we have over 25 jumpers to send off to the collection point in Scotland. She encouraged us to keep going. Any baby jumper pattern will be acceptable just so long as they are darker colours.
Finally there was a show and tell session in which several people showed us what they have been making.
Brenda brought this jumper, made for members of a bridge club.

Bridge Club Jumper
Bridge Club Jumper


Anthea brough in some older patterns and books that she wished to re-home. Contributions to club funds were all that was asked for them.

Members were reminded that the AGM will be held next month and Iris Bishop will be our speaker. It is starting at 7:30 for the club business before the meeting.

February 2013 Meeting

The Competition  and Cheese and wine Evening.

There were several high quality entries in each category of the three categories:

  1. A child’s hat
  2. Fruit and Veg, 
  3. Hearts (this was in  honour of Valentine’s day).

Thanks you to all members who took part.

After the usual notices, we had a lovely cheese and wine social evening allowing everyone a chance to look at the competition pieces and vote for their favourites.

Buffet Table (
Buffet Table

The winners were Anu for the colourful and fun child’s hat and Kathy and Margaret tied for the Fruit and veg, Margaret won the Cream Hearts scarf.  All the entries were of a high standard.
 

Child's Hat Entries
Child’s Hat Entries
 
Fruit and Veg entries
 
Hearts Cream Scarf - Category Winner
Hearts Cream Scarf – Category Winner
 
Hearts Cushion in Grey and Red
 
Hearts in Pink and White
 
Hearts in Pink and Blue


Finally, we had a raffle with some very nice prizes

Raffle Prizes
Raffle Prizes

January 2013 Meeting

This was the first meeting in the Old Barn Hall in Bookham. Chairman Kathy gave out some notices then we settled down to listen to Margaret’s talk and demonstration.
Title:
Seamless Machine Knitting
With a few digressions and many mistakes

The first digression was a child’s jacket made using a nearly seamless construction, called the “Surprise Jacket”, it was adapted for machine knitting from an original pattern my the late Elizabeth Zimmerman. Many versions of this jacket exist – just Google “Surprise Jacket” to see both hand and machine knitted

Surprise jacket
Surprise jacket

versions and patterns. It demonstrated how a garment can be constructed with fewer seams than usual, the idea has also been the subject of several articles by Bill King in Machine Knitting Monthly.

In a second digression, Margaret showed us that when gathering stitches having taken them off onto waste yarn and started to rehang them, the order in which you picked up three stitches to hang onto a single needle could be varied giving different gathered looks. For example, instead of just picking up stitches 1,2 then 3 if the order was 1,3,2 or 3,1,2 say, it created subtly different effects.

two gathering needle arrangements
Gathering two sections using different needle arrangements

The rest of the talk was inspired by a workshop run by Amy Twigger Holroyd which inspired Margaret to develop her own take on both seamless garments and surface decoration (added on the machine rather than by sewing decorations on an item after it had been knitted).

Firstly, a construction method was discussed where the creation of a very flat seam was done by picking up on every other row the lump or “knop” that is created on the edge of a piece when the yarn goes from one row to the next. A chunky machine was used to demonstrate this to the group so it was easier to see the work in progress.

Flat seam 1
Flat seam 1

Margaret passed around several samples that used this method. It can be used for picking up and matching rows or picking up stitches. One example she showed us was of a raglan sleeve on a child’s jumper.

Various members tried out this technique.

The second part of the talk was on surface decoration. A technique to add narrow strips of stocking stitch to a plain piece of knitting was demonstrated, the strip had a ladder on the centre needle so that it could be picked up easily. Each strip was picked up so that the right side which had the usual stocking stitch curls on the edges was applied every few rows, 6-8 rows of

3 pieces joined on machine with flat seam technique

the strip was picked up every 2 or more rows giving the ruched effect shown in the photos. Various variations on this theme were shown and several members tried out this technique.


Finally Margaret showed us some lovely items she had been making using there techniques.


Cushion Cover 2 and 3
Cushion Cover 2 and 3 using different colours


Trying the new techniques

Cushion Cover 1